Let’s begin.
How to Create a Table of Contents in Google Docs
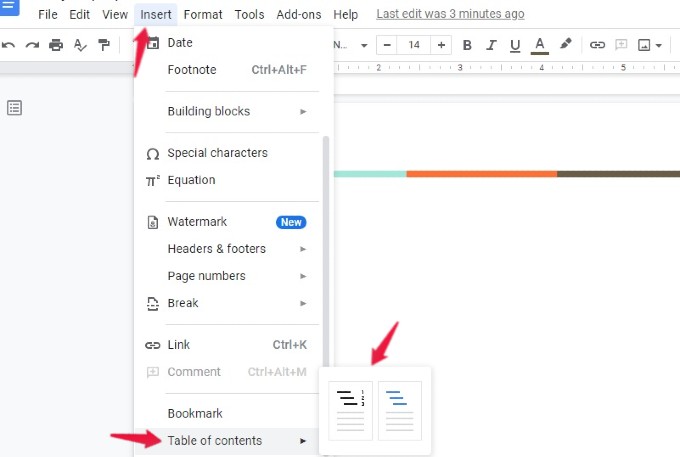
Whether you are preparing an elaborate research paper or a detailed project description document, adding a table of contents will help you to navigate the document quickly. Launch any browser on your computer, go to docs.google.com and open the document to which the contents need to be added. Next, go to a blank page where you want to add the table of contents. Then, click the Insert menu in the toolbar on the top and scroll down to the bottom. When you move your cursor over the Table of Contents option, you will see two different styles. The first style will list all the headings with page numbers, whereas the second option will insert blue-colored links that allow you to navigate to that page. You can use the first option if you plan to print the hard copy of the document. The second option will be ideal for reading the document online as a PDF or Word doc. You can select your desired option to insert the table of contents based on your need.
How to Edit Table of Contents in Google Docs
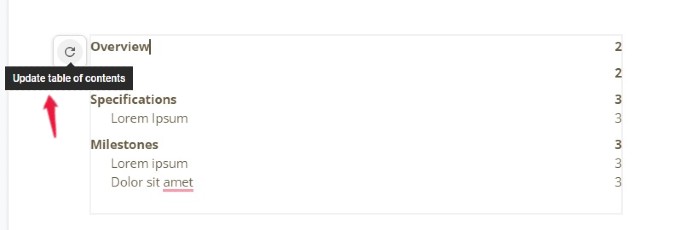
Let’s say you have added a new heading in the document and want to add that in the table of contents. After editing the document, go to the table of contents page. If you click anywhere inside the table of contents, you will see a small Refresh button. When you click on that, the table of contents will automatically update.
How to Delete Table of Contents in Google Docs
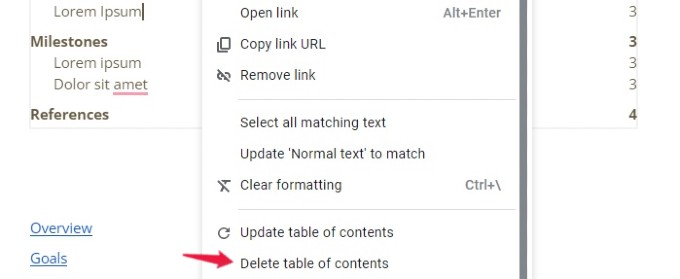
Do you need to get rid of the table of contents as it is not needed? You can easily do that with a single click. Open the Google Document and navigate to the table of contents page. Then, right-click anywhere on the table of contents. Click the option Delete table of contents from the list of options shown in the menu. That’s it. The table of contents will not be displayed anymore on your document in Google Docs.
How to Add Table of Contents in Google Docs from Phone
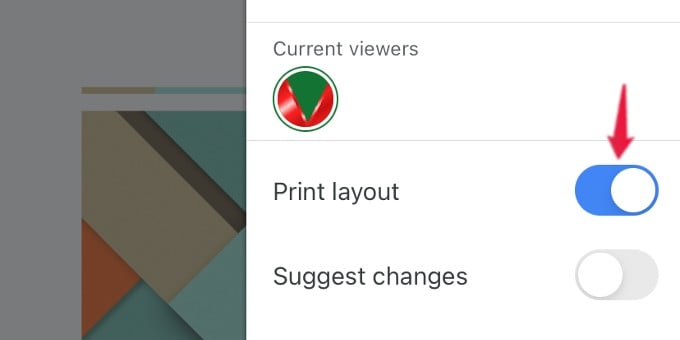
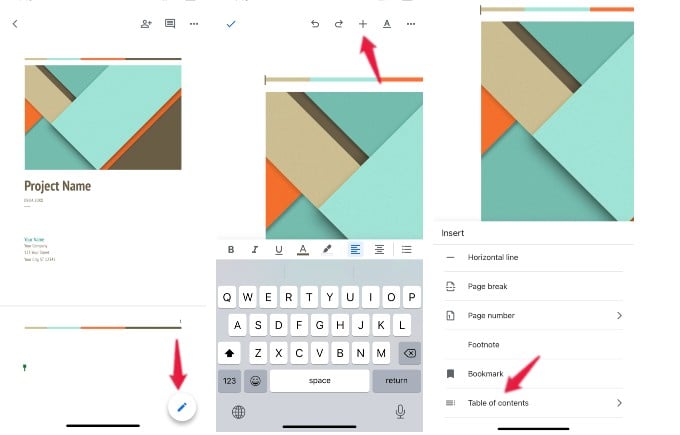
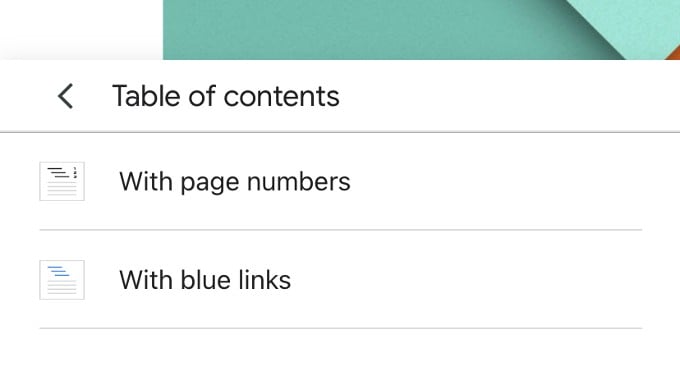
In case you don’t have access to a computer, you can still add the table of contents to your document on the go from your iPhone, Android, or iPad. Let’s see how to do that. On your phone, launch Google Docs app and open the document that needs to be edited. Next, tap the Ellipsis icon on the top right. In the pop-up menu that appears on the screen, toggle the field Print layout to ON. Then, tap the Blue color Edit icon on the screen’s bottom right. Next, you will see a new set of icons on the top. Go ahead and tap on the + icon. Now, a new menu titled Insert will be displayed on your screen. Scroll down to the bottom of that menu and tap Table of contents. Like on a computer, you will see two options: With page numbers, With blue links. Once you select one of them, a table of contents will be inserted into the document.
Update Table of Contents on Phone
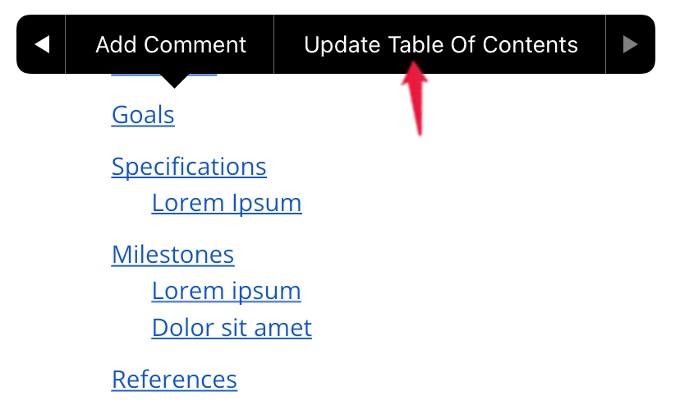
If you have added a new heading, you can update the table of contents from the Google Docs app itself. For that, go to the table of contents page and long tap anywhere near the headings. Then, keep tapping the arrow in the new menu until you see the Update Table of Contents option. Once you tap on that, the table of contents will get updated.
Troubleshooting: Table of Contents in Google Docs
Don’t you see any table of contents after clicking the option from the Insert menu? This can happen only if you have not formatted the text in your document to headings and paragraphs. To fix that, click the Format menu in the top toolbar on the Google document. Next, move your cursor over the option Paragraph styles. Here, you will see six types of heading styles from Heading 1 to Heading 6. Go ahead and format the document with the proper heading levels. Now, if you try to create the table of contents, it should appear correctly without any issues.
Δ


